Using Flow to create Multiple tasks for a User Story in Azure DevOps
We might have seen about how to create a Task automatically in Azure DevOps for a UserStory using Flow.
Now let us see about how to create multiple tasks for the same story and also how to order it (E.g Development will be First, next will be Code Review, next will Deployment and then there will be Testing tasks)
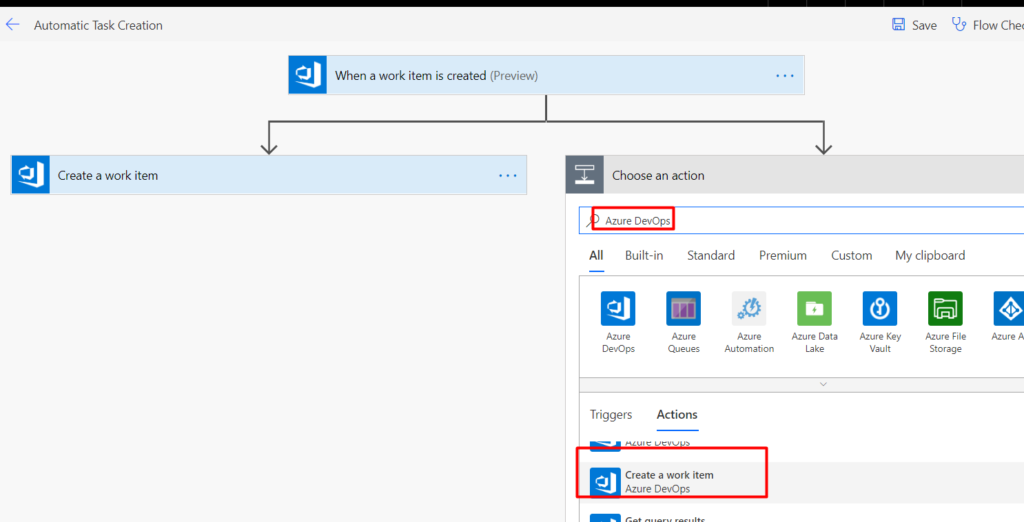
Step 1: Go to the same flow as shown in the previous post and click on the parallel branch as shown

Step 2 : Then Choose create a WorkItem from the connector as shown

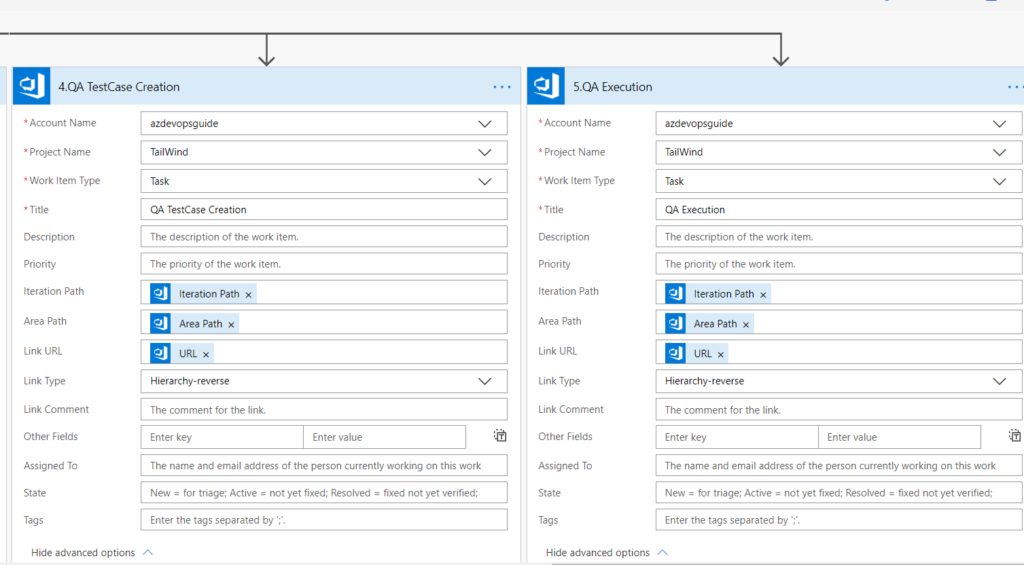
Step 3: Then enter the details as shown and also Choose a title for this task, along with Iteration Path, AreaPath and Link Details (remember to fill the link details otherwise your task will be an unparented one)

Step 4: Repeat the Step 1 to 3 so that you can create separate tasks for Deployment, QA Analysis, QA TestCase Creation, QA Execution etc,,
Step 5: After creating all the above your flow will look something like this as shown below

Step 6: When you flow has run successfully you will get a message like this as shown below

Step 7: And in Azure DevOps, tasks will be created automatically as shown below

By this way you can create multiple tasks by using a single flow for a UserStory or for any workitem across Azure DevOps.
But one problem in the above technique is the tasks are not ordered for which we can make use of stack rank to order the tasks – See over here to know more about how you can order the task in flow
This is a 3 part series which explain in detail about how to create tasks using flow. You can see all the articles below
1. How to Create Tasks using Microsoft flow
2. How to Create Multiple Tasks
3. How to Order Multiple created tasks using Microsoft Flow & Azure DevOps
If you any doubts contact me on Twitter at @Ramanean or on @AZDevOpsGuide
