Secrets Scanning in Azure DevOps Repositories
Sometimes Developers might be checking in secrets like passwords, usernames, API keys, client secrets, service principal and passwords into repositories. And it becomes necessary for us to detect them as having secrets like those in repositories is not a best practice as there is a every chance of a contractor or disgruntled employee leaking those secrets once they leave the organization, so let us see here how to detect the secrets in the code that are in Azure Repos by using the readily available extensions in the marketplace.
Git Leaks: It’s a open source tool that scans the repositories for the secrets and publishes a report in CSV or JSON or in SARIF format. We are going to use Git Leaks to detect the secrets and publish them as a SARIF report so that it could be displayed in the Build pipeline itself.
Steps to Reproduce:
Step 1: Go to Azure DevOps Extensions MarketPlace
Step 2: Then install these extensions GitLeaks Extension and SARIF SAST Scans
Step 3: Once the extensions are installed, Go to Build pipeline and follow the steps below
Step 4: Add a repo of your choice and add GitLeaks extension into the Build pipeline

Step 5: Enter the scan location as $(Build.SourcesDirectory). If you want to scan only specific location inside the Source directory, you can just add the folder path of that location to the $(Build.SourcesDirectory) E.g You can add something like $(Build.SourcesDirectory)\UserRegistration.

Step 6: Scan configuration can be either Default, Predefined and Custom Configuration. Predefined allows you to choose from UDMSecretChecksv8.toml or GitleaksUdmCombo.toml (CredScan files) and the secrets detects greatly differ based on the Configuration types choosen. You can also use a Custom Configuration Type which allows you to input your own configuration file as shown here

Step 7: There are different scan ranges available as shown in the below screenshot. We can either choose all the commits, Pull request commits or Commits between the builds or other options as shown. The best option is go with flat which scans the entire code (the latest source code) for secrets and you can also choose Custom if needed

Step 8: Checking the Redact box will redact the secrets from being displayed

Step 9: Reporting section has many options like shown below.
” Checking “Fail the task if secrets are found” will failure the entire build when secrets are found (This will happen if you want Developer to be notified as soon as they commit some secrets into the code) by failing the build
“Upload Results” – This will publish the results as an artifact
“Report Format” – We can choose the report format a JSON, CSV or in SARIF (which is the standard format)

Step 10: Then click on “Save and Queue” the Build.
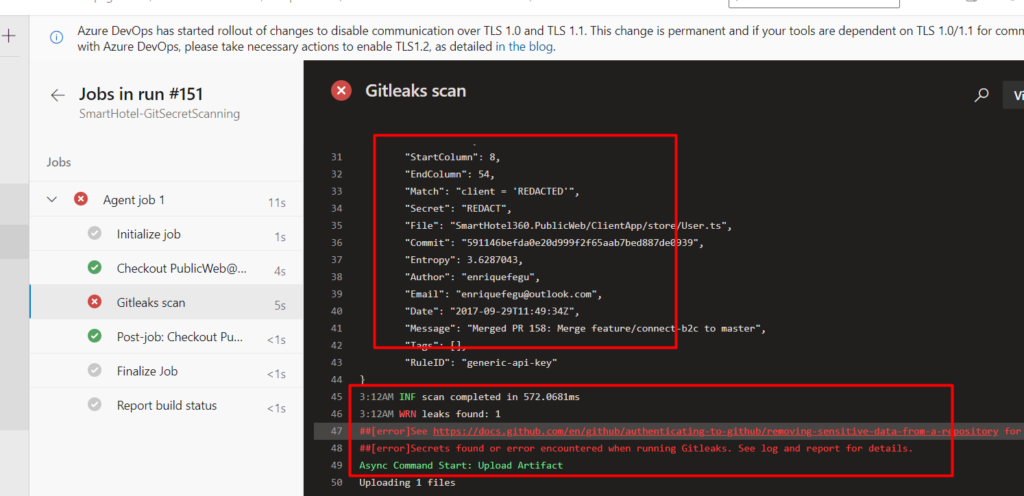
Step 11: Git Leaks scan would start running as part of the build process itself and if any secrets are found the task would fail the build as we have choose the option of failing the task if secrets are found

Step 12: In the above screenshots the secrets are found, so the task has been failed and reports can be generated in CSV, JSON or in SARIF format. In our case we have chosen to generate the reports in “SARIF” format so that we can view it the SARIF report viewer tab on the Build pipeline.
Step 13: Once the build is completed, the reports (SARIF, CSV and JSON) would be stored as artifact which can be viewed under the Build artifact as shown below (This file is stored in SARIF format which is the standard format for displaying security bugs)

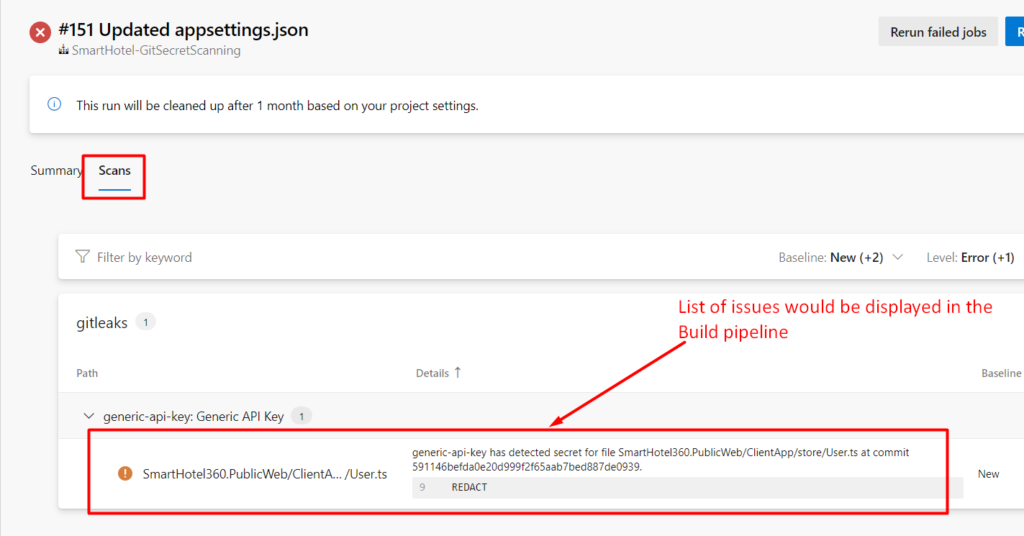
Step14: Go to the Build Summary page and then click on Scans tab. In the tab you would be able to see a nice summary report of secrets found in your repository and in which line.

