YAML default branch for Builds & Releases in Azure DevOps
Sometimes we may need to use different branches for different Builds & Releases but with the same build pipeline. So it becomes necessary to set a default YAML branch for a Build or Release pipeline. The below steps with explain how to set a default branch for 2 different pipelines using the same YAML file from the same repository in Azure DevOps
Step 1: Let us say we have 2 pipelines as show and there are 2 branches one is main and another is Smoke branch.

Step 2: When you try to run the SmokeBranch pipeline it will be always pointing to main branch instead of smoke branch in the pipeline.

Step 3: To change the default branch, go the pipeline, click on the 3 dots and then click on Triggers/=

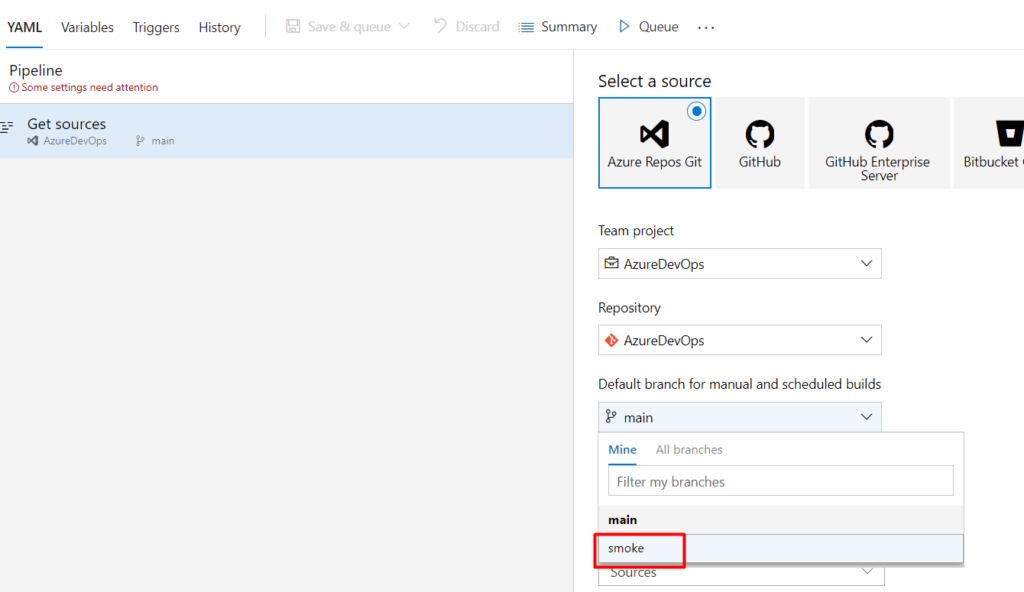
Step 4: Click on YAML

Step 5: Click on Default branch and choose the branch as Smoke from the list of branches that are available

Step 6: Once you save it, Smoke branch will be displayed here and in the YAML pipeline also it will be displayed

By this way, we can select a default branch for any YAML build pipelines.
There might be different YAML build pipelines using the same YAML file in the same repository with different branches. E.g We may need to run Smoke and Full Automated tests but the timeout might be different for these tests which we may need to hardcode in the YAML files instead of variables which makes a pressing need for different branches.Let us see how to make a branch a default for different builds in Azure DevOps
