Azure Speech to Text | Demo & Pricing
Azure Speech to Text is an offering similar to that of Google Cloud’s Speech to Text and it can be easily integrated into websites and apps with minimal coding. This is offered under a service called “Speech Services“ under Azure which includes Speech to Text as well as other related services like speech transcription, text-to-speech, speech translation, and speaker recognition. Let us see below how we can quickly get started with Azure Speech to Text by using CLI as well as with Javascript NPM or Python or any other language..
Creating Azure Speech Services Resource: The first step is to create Speech Services under your Azure Subscription and then get the keys which can be further used to access the Speech Service API (Cognitive Services API). The resource has 2 keys and you can use either one of them.There are different options available for translating Speech to Text such as Real Time translation as well as Batch translation.
Step 1: Go to Azure Portal and search for Speech services
Step 2: Then enter the details as shown below. Enter a name and also select a region where it should be hosted along with a pricing tier. (For Demo purposes , Select Pricing tier as Free

Step 3: Once the resource is created and deployed a success message would be displayed as shown below

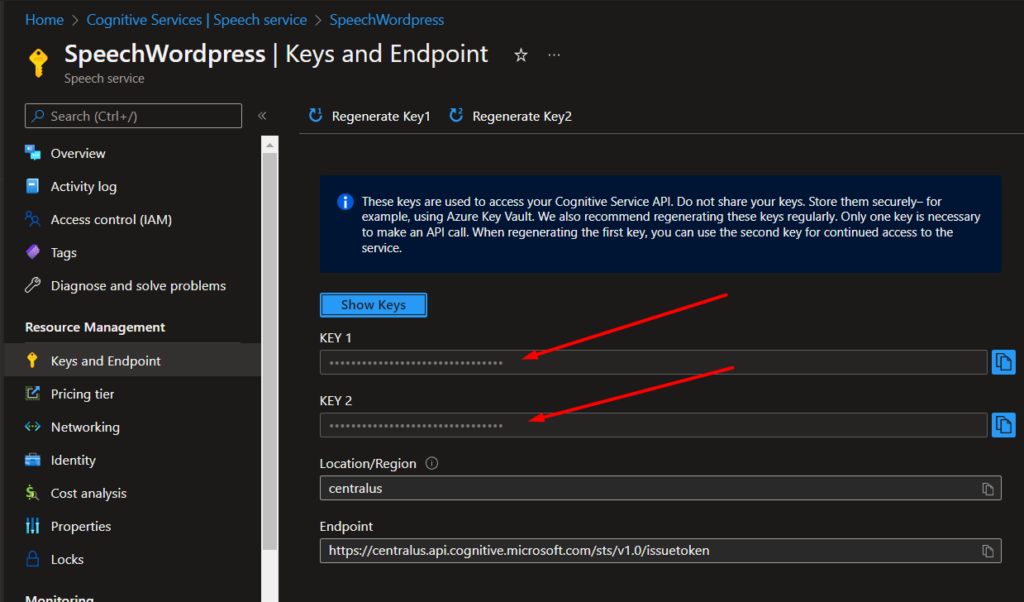
Step 4: Go to the resource and then click on Keys and Endpoint from where you will be able to copy the keys needed to access the speech services. This keys are needed to access the Speech to Text provided by Azure Speech Services.

Azure Speech to Text Demo using .NET CLI:This is quick demo that would allow you to get Azure Speech to Text up and running using CLI commands in your desktop provided you have Visual Studio installed already
Step 1: Open Visual Studio and then go to Tools → Command Line → Developer Command Prompt
Step 2: Then run the below command to install Speech Services CLI SDK
dotnet tool install --global Microsoft.CognitiveServices.Speech.CLI
Step 3: Once it’s installed, the next step is to set the subscription key by running the below command which is used to access the speech services resource in Azure via APIs. This can be found under “Keys and Endpoints” in Azure speech services resource (In the below command, subscription-key should be replaced by your actual subscription key)
spx config @key --set SUBSCRIPTION-KEY
Once the command is executed as shown below the key would be saved at the particular location as shown below.

Step 4: Now we are all set to convert Speech into Text! All we need to do is run the below command as shown below. Instead of source as “en-US”, other languages codes such “en-IN”,”en-gb” etc.,
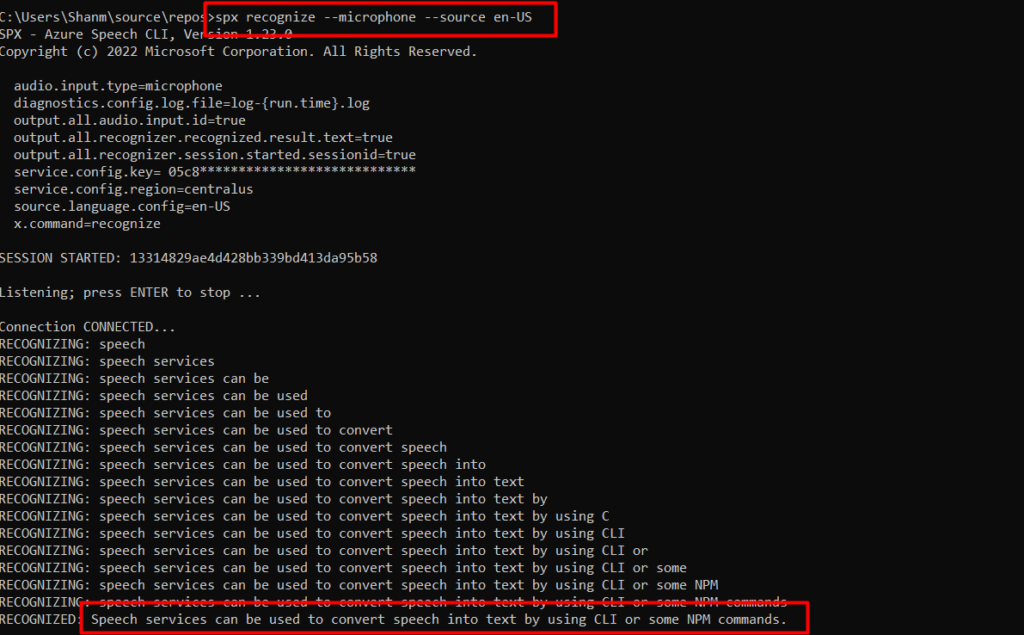
spx recognize --microphone --source en-US
And once the command is executed, you can start speaking into your Microphone and it would translate the text as shown below. If there is a longer pause then the sentence would be completed, it would start as a newer sentence!

