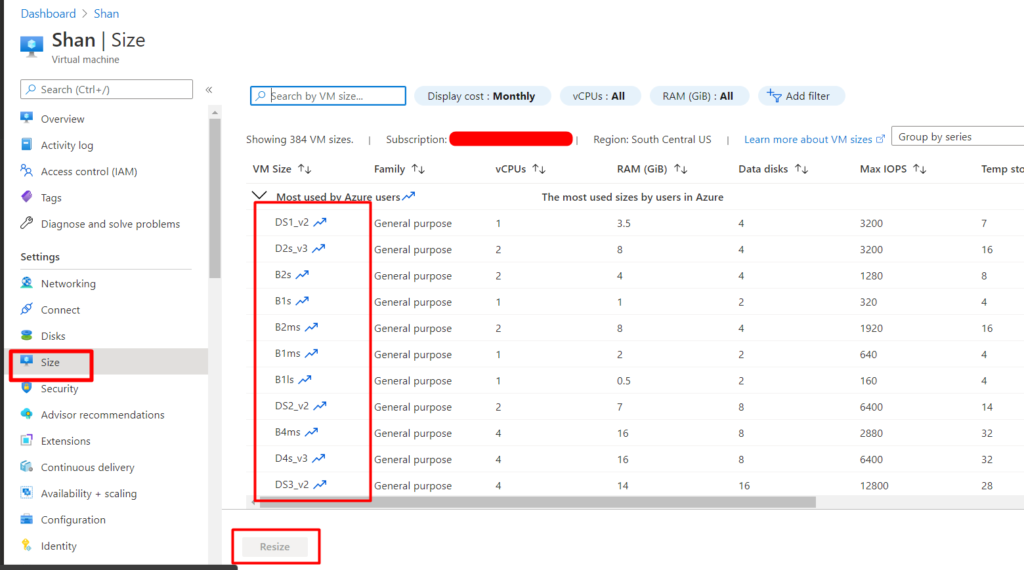
We may not be using a virtual machine all the times so instead of deleting the virtual machine, we may need to downsize or resize the machine from it’s current configuration. There are different VM sizes from which we can choose to resize (upgrade or downgrade) the current machine. VM size is nothing but a combination of vCPUs, RAM, DataDisks, MaxIOPS and temp storage.Now let us see how to resize the machine from it’s current configuration
Step 1: Login into the Azure Portal and from resources select on the machine which you like to resize
Step 2: In the Virtual machine window you will be able to see the current machine size as shown

Step 3: Then click on Size and choose from one the VM Sizes by clicking on it.

Step 4: After choosing the VM Size, click on Resize button at the button (The button will get enabled once you choose the VM Size)
Step 5: After Resizing the virtual machine you will get a notification as shown

By following the above steps you can resize a virtual machine using UI. you can also resize a machine using Azure CLI